
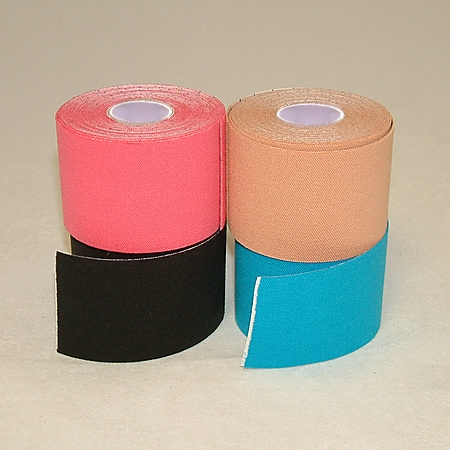
Dr K Kinesiology Tape
It’s well known that Kinesiology taping is very effective in alleviating muscle and joint pain, as well as preventing over-contraction and provide support.
It is still very important to know the fundamental kinesiology tape application principles to maximize the benefits it can give you. And since wrong application methods would reduce the effectiveness of the tape, we’ve come up a comprehensive guide to help you get the most from Kinesiology taping…
Kinesiology Tape Application
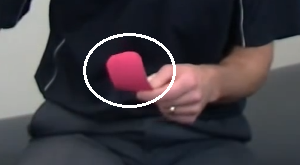
Here’s a video with Kinesiology taping expert Mr. Adam Collyer giving easy-to-do application principles…
[youtube]https://www.youtube.com/watch?v=7YtppZiqnFE[/youtube]
Skin Preparation
- Ensure the skin is clean and dry.
- Do not use any type of moisturizers (i.e. oil, lotion) because these would affect the adhesiveness of the Kinesiology tape on the skin.
- Remove excessive hairs on your skin by shaving or clipping to ensure these would not affect the application of Kinesiology tape.
- Avoid applying the tape on skin areas with cuts, scrapes, burns, sunburn or any kind of skin irritation (e.g. rashes, allergy)
Tape Preparation 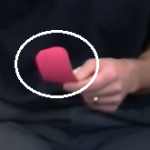
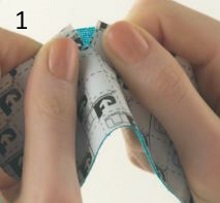
- In preparing the tape, rounding the corners or cut the edges of the tape. Corners of the tape might become catching points on clothing, and other things which could affect the Kinesiology tape’s adhesiveness. Cutting the edges is a vital step in helping stop the tape from peeling off.
Tape Tension
Tape tension is one critical factor in Kinesiology taping. Tape tension can vary depending on different circumstances involved. For swelling problems, 25% tape tension could be applied. Tension applied generally on muscle and joint problems is usually 75% tension. For support or correction of injuries, 75% tension can be applied.
Another important thing to consider is to apply “no tension” on both ends of the tape. If no tension is applied on both ends, the tape provides lifting effects whilst provide better decompression of the Kinesiology tape. On the other hand, applying tension on the ends will compress the tissues more than unload or decompress it.
Tape Application
In measuring the tape, ensure that the tape will have to cover the “stretched” muscle/joint. This is to allow full flexibility of the tape and to avoid impeding the patient’s activities. Furthermore, this allows better decompression whilst more effective in muscle functioning. The rationale behind having the stretched muscle length equal the tape length applied is that when you move to shorten the muscle, the tape will shorten as well and thus allowing lifting and decompression.
Once you’re done with the skin and tape preparation – then you’re already set to apply the tape! Here are two application methods you can follow:
1. End-to-End Tape Application: Create an anchor tab near one edge of the tape by folding the tape 2 or 3 inches from the edge. At the line, tear the 2 or 3 inches of the backing (paper) then create a crease which you can use to peel the tape from edge to edge. Now in applying the tape, simply stick the edge of tape (the part with torn backing) then rub it for a few seconds. Finally, pull and remove the remaining paper backing from the tape starting at the anchor tab created.
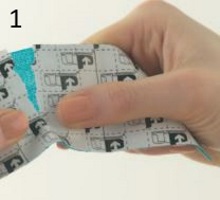
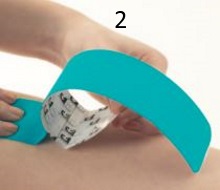
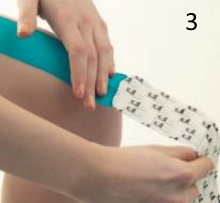
Note: Remember not to touch the adhesive and that’s why creating an anchor tab is important in Kinesiology tape application. If the tape’s adhesive is touched, it will already stick and this would affect the adhesiveness, longevity and effectiveness of the tape.
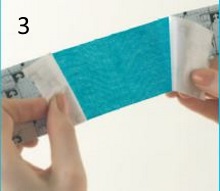
2. Center Tape Application: Horizontal pieces of tape can also be used to further provide better decompression to the tissues underneath the skin and unloading support over the injured part of the body. In this method, the tape is folded at the center. Tear along at the middle line and then peel the backing apart before sticking the tape over the injured part. This tape application method is applied similarly to Band-Aid plasters.
Tape application tip: The Kinesiology tape is heat activated and rubbing the tape would activate its bonding agent which helps it stick on the skin effectively. Rubbing would maximize the tape’s effectiveness whilst allows the tape to stay on the skin much longer.
Post-Application Tips
An important part of Kinesiology taping is to ensure that the tape would stay onto the skin effectively. Some points to consider are:
- Prevent it from catching on other things such as clothing or accessories
- Pat Drying the application area (avoid rubbing the tape when wet)
If the edges of the tape starts peeling off, prevent further peeling by trimming and removing those parts. Afterwards, give the remaining tape some rubbing so that the bulk of the tape will still stay on the skin even when small portions of the tape were already removed. Most probably, the removal of these small parts wouldn’t significantly affect the Kinesiology tape’s effectiveness.
Were we able to help you?
More than anything, our primary aim is to educate and provide you the best and the latest sports-related medical techniques and news.
In this regard, we would certainly love to know whether we were able to provide you the information you needed. If we were able to help you, feel free to share or like this article and video J You can also suggest other sports-related medical topics that we could cover later…